IGMA Artisan Lynda Ulmer has been busy. She is a customer of mine and I have not checked out her website in a while. But I caught a post of hers on the MSAT mini dolls list and clicked on one of her ebay acution of the most wonderful detailed miniature shoes. So that led me back to her website.
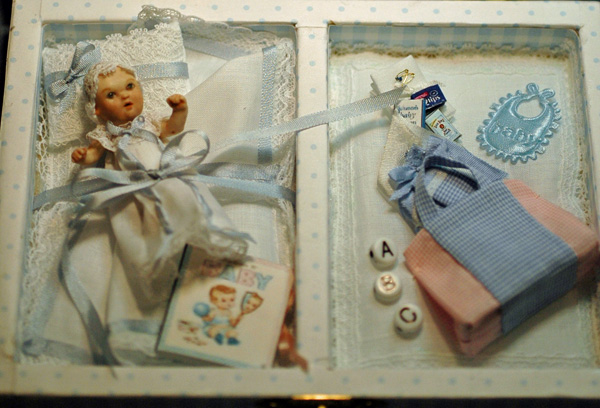
A little about Lynda in her own words, "Miniature dollmaking is challenging because it involves many diverse skills, such as sculpting, working with porcelain clay, firing and china painting, costume and pattern design, sewing and wigmaking. Although frustrating at times, being able to utilize so many creative talents can also be extremely rewarding. The wonderful people I have met as a result of my involvement in dolls and miniatures have truly been an inspiration and a blessing. I am an Artisan member of the International Guild of Miniature Artisans (IGMA). I am also a member of the United Federation of Doll Clubs, Bismarck Doll Friends, and the Midwest Miniature Guild. I participate in the Tom Bishop Chicago International miniature show every other year. My dolls and accessories are in private collections in the USA, Canada, England, Spain, Switzerland and Germany."
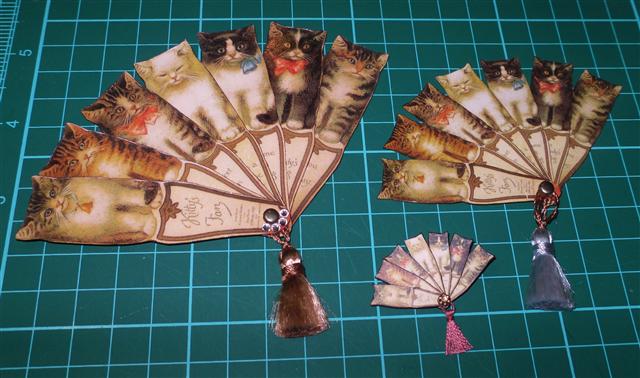
Then a saw this precious tutorial and give away and had to ask her if I could share it here. She said yes...so here it is from Lynda Ulmer. Be sure to check out her website and dolls also. LyndaUlmer.comMichelle minidolls.com Kitten Fan
Click here: Gift for You to see how you can receive this vintage-style kitten fan!
kitten fan
Xacto or craft blade
small sharp scissors
brown or gold magic marker tacky glue
super glue gel
cardboard surface or self-healing mat to cut on
head pin or small brad fastener (included with the size fan you request)
corsage pin (for XS and S fans) or small paper punch (for M, L and XL fans)
2 tiny decorative findings and 1 flat-back Swarovski crystal (included with XS and S fans)
embroidery floss for tassel (optional)
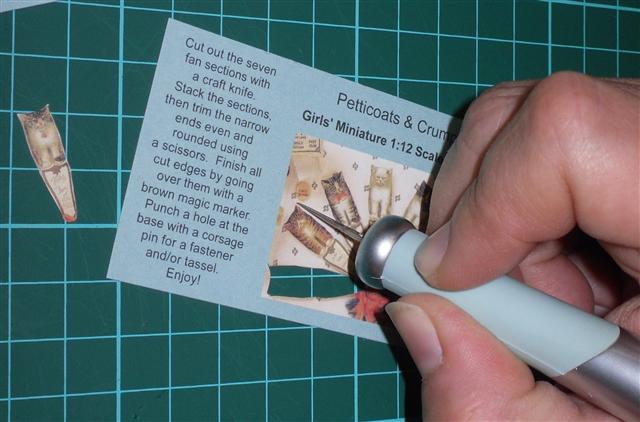
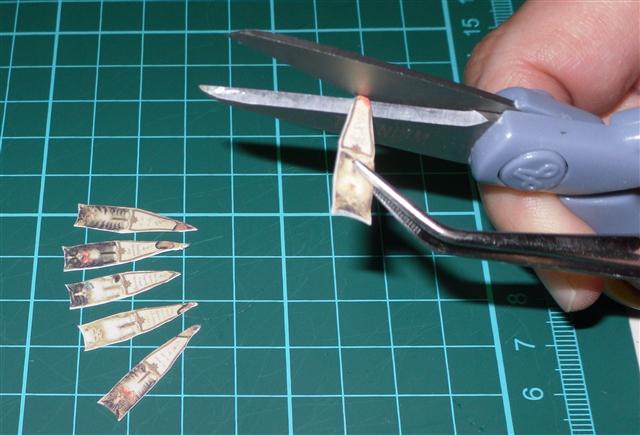
Step 1
Cut out the seven sections of the fan using an Xacto or craft blade on a cardboard surface or self-healing mat. Press firmly and keep your blade perpendicular to the fan. Trim
any uneven areas with a scissors.
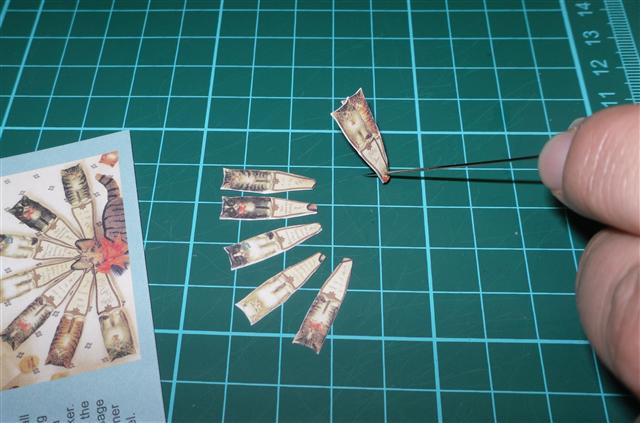
Step 2
Stack the first section on top of the second, matching the sections at the wide end (ears of the kittens). Trim the narrow bottom ends even and rounded. Repeat this step for the remaining sections.
 Step 3
Make a hole at the base of all the fan sections with a corsage pin or small paper punch, depending on the size fan you are working on. This is where either a head pin or small brad will go that holds the sections together. If using a pin, push the fan section all the way up onto the pin so the hole will be large enough to insert the head pin in Step 5.
Be sure to keep the sections matched up at the top. Then all the kitty ears will be even when the finished fan is open.
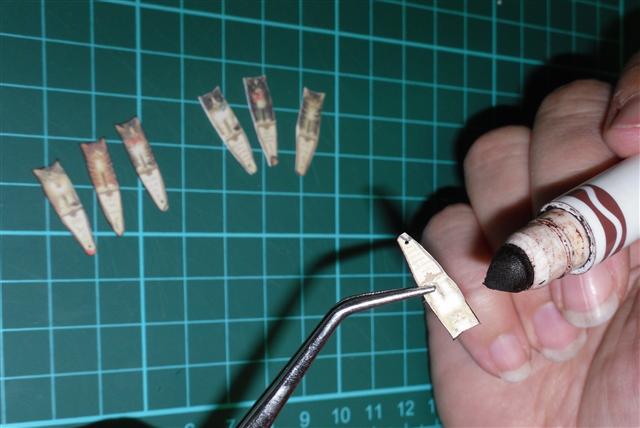
 Step 4
Use a brown or gold magic marker to color over the cut edges on all sections. Set the finished sections aside for a few minutes until the marker dries, or seal the back with clear acrylic spray sealer so the marker doesn't smudge.
 Step 5Carefully slide each section onto the head pin or brad. Be sure to place them in order so the printed poem reads properly from beginning to end.

Step 6
If you want to add a tassel to the front, do so with a dot of tacky glue before securing the head pin or brad.
If using a head pin (for the extra small and small fans), slide the extra gold finding onto the back and secure with super glue. Place the wire cutter next to the finding and cut off the excess pin. Seal the cut with a dab of glue. Use super glue to cover the front head pin with the other tiny finding and a flat crystal.
If using a brad (for the medium, large and extra large fans), secure it and trim off any excess wire that shows in the back.
 Close-up view of where to glue tassel and finding on the front.
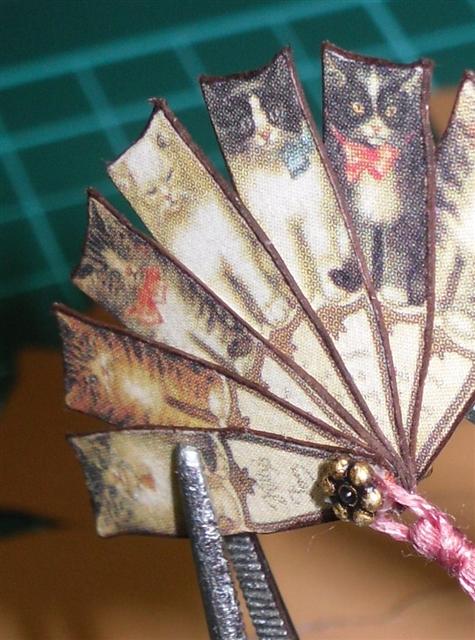
Step 7
Spread out the fan sections and admire your work. How cute!