

Sunday, August 31, 2008
Thursday, August 28, 2008


Tuesday, August 26, 2008

Sunday, August 24, 2008
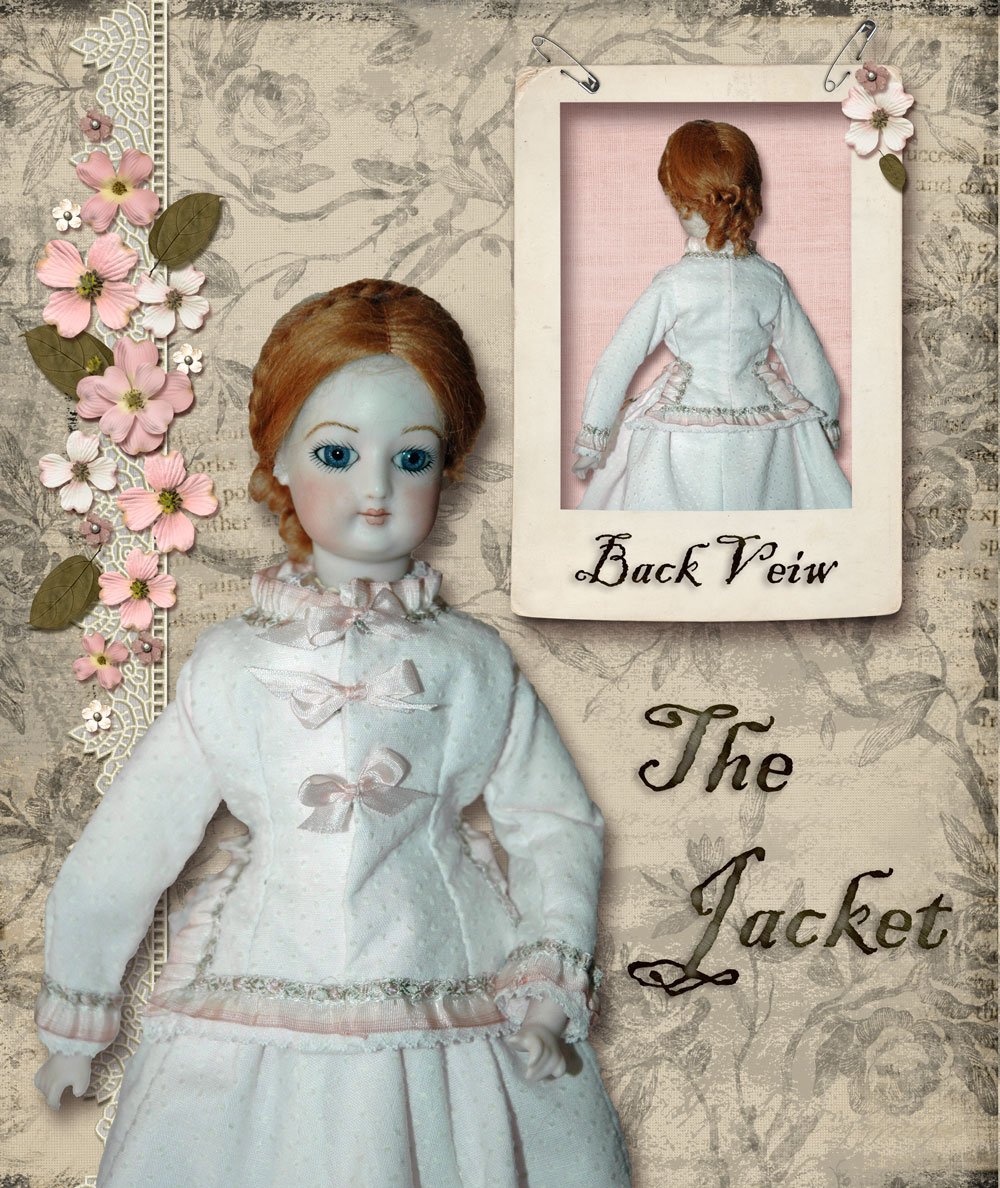
Chapter 8 - The Jacket
At the time, I was creating the jacket from the inspiration picture I found myself with limited quantities of trim on hand. (Do not tell me it has never happened to you, either. It happens ALL the time. I hate it, don't you?) I found myself having to improvise just a tiny bit. I chose to use the ruffled trim around the sleeves, the collar and the jacket hem and changed the front closure. Serendipity happens. To solve the front closure and decoration issues, I sewed hooks under prettily tied bows. It suits Emilie and her "style." Kathi
Saturday, August 23, 2008
A Horn Tooting Session
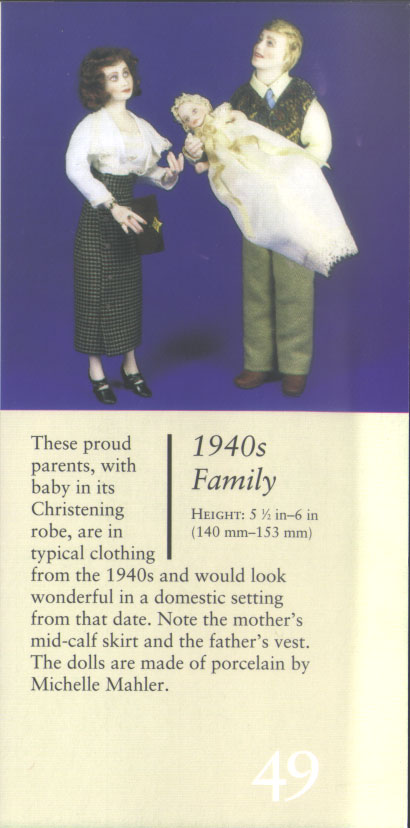
I was published in the wonderful little 3 book set entitled: "Masterpieces in Miniature Dollhouses" by Nick Forder. Michelle The cover doll above is created by Gale Elena Bantock. The entire figure including hair, dress, face is made entirely of paper and paper mache.
 The cover doll above is created by Gale Elena Bantock. The entire figure including hair, dress, face is made entirely of paper and paper mache.
Tuesday, August 19, 2008
New Striped Silk at Doll Artist's Workshop/minidolls.com
 Doll Artist's Workshop presents the most LUSCIOUS stripe silk Shantung...in many different colorways. Can you stop at just one color? I could not..I had to buy them all. The stripe pattern is under 2mm wide. Follow this link to see them on my site---> Silk Stripe The scans do not do them justice. The are really lustrous and rich.


Monday, August 18, 2008

Sunday, August 17, 2008
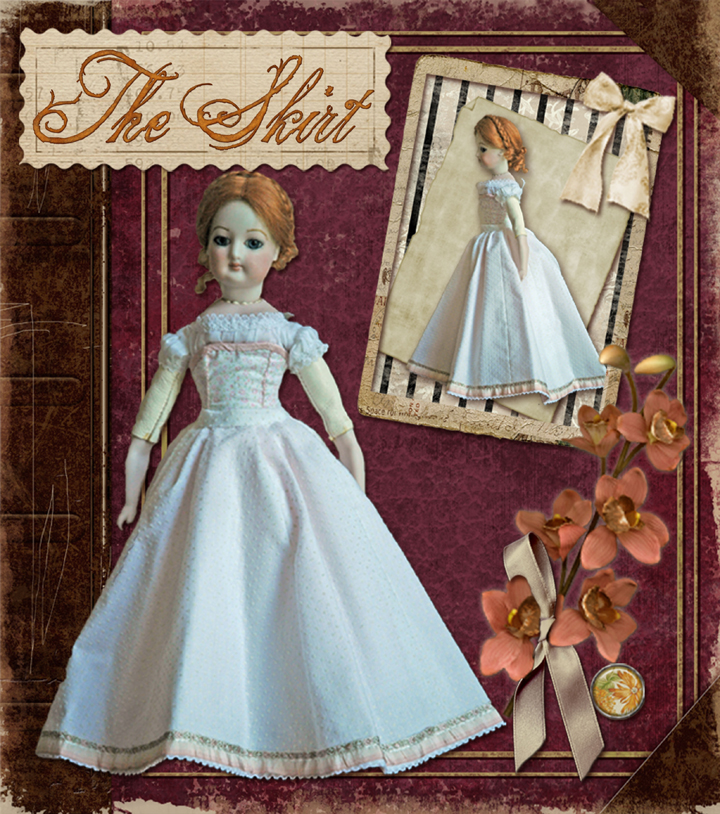
Chapter 7 - Her Skirt
Emilie has taken her last growth spurt and has come of age so it is time to lower the hems of her dresses to full length. She is now a full 12" tall. (That is 5'6" in real people size.) Here Emilie Claire poses with her skirt both front and side. Her skirt created using white dotted Swiss with a pink Swiss batiste lining. There is a fine lace edging with a ruffle French ribbon on top. Emilie likes clean lines and simple decorations. The pattern she saw in a book had a beautiful ruffle around the bottom. Emilie thought it did not fit her personality very well and asked for a smaller ribbon ruffle. She is as pleased as the pink goes well with her strawberry blond hair and blue eyes. "This will be the most beautiful traveling suit," she exclaims to the dressmaker. "Mother", she adds, "Do you thing we can go the hat maker and see if she has roses the color of Grandmother's roses? Wouldn't they be grand on a pink hat to match?"
Kathi
Kathi
Saturday, August 16, 2008
What is a Cartridge Pleat?
Brad Deville of Deville Doll Designs after reading the Early Victorian on 8/13/08 asked me in a comment what a Cartridge pleat was. I found a great article on line that explains this type of pleats. The directions below are for a "people" clothes. So the idea would have to be edited for a doll.
Cartridge pleating is a method of gathering large amounts of fabric to a small waistband or shoulder armscye without adding bulk to the seam. It also makes the fabric spring away from the waist or shoulder more than normal box-pleating, knife-pleating or gathering does. It was fashionable for gathering large sleeves to the shoulder on men's clothing during the 15th century, and was also a popular method during the 16th century for attaching full skirts to waistbands and bodices.
Cartridge pleating must be sewn by hand, but in many cases is worth the effort. When creating an Elizabethan gown with a heavy skirt, it adds to the period silhouette; in some cases, the "spring" caused by cartridge pleating can eliminate the need for a bumroll under the skirt to hold the fabric out from the hips.
If you've never cartridge pleated anything before and plan to do it for a skirt or sleeve, it's a good idea to take a length of the fabric you'll be using and pleat it, using the following instructions, before pleating the skirt or sleeve itself. This way you can work out the optimum stitch size, gathering tightness, etc. for this particular fabric.
 First, take the edge of your skirt which you plan to attach to a waistband and fold over the edge to the inside 2 to 3 inches. If the skirt fabric is a relatively thin one, you can add a strip of wool, flannel, velvet, or other thick fabric inside this fold to give the pleats more body.
Using a strong thread (I use a silk buttonhole twist), sew a largish running stitch half an inch away from the folded edge of the fabric. Leave a length of thread free at the beginning and end of the stitch. Repeat this running stitch half an inch further away from the edge, making sure that the thread goes in and out of the fabric at the same places as your first row of stitching did. Leave lengths of thread free at the beginning and ends of this row, as you did the first one. Once again, move 1/2 an inch further away from the edge and do another row, matching the ins and outs of the above two rows of stitches.The size of the stitches depends on the thickness and body of the fabric you're pleating. If you're using a heavy upholstery velvet, the stitches can be half an inch to 1 inch wide. If you're using a brocade or other thinner fabric, make the stitches 1/4 to 1/2 inch wide. Experiment a little, if possible, before starting on the actual clothing item.
Knot the three threads together at each end. Then begin pulling on the threads at one end, gathering the fabric as you go. It should accordion together into deep pleats. (see picture to the right) Ideally, you should gather the fabric tightly enough so that it doesn't slide back and forth, but not so tightly that there's a lot of tension on the threads. Once you've gathered the fabric, and measured it to see that it fits the waist, knot the threads you used to gather the pleats together so that they stay properly gathered. 
Leed, Drea, A Short Tutorial on Cartridge Pleating a Skirt] ©2000 Dayton, OH: Author. Retrieved [8/16/08] from the World Wide Web: elizabethancostume.net
Cartridge pleating is a method of gathering large amounts of fabric to a small waistband or shoulder armscye without adding bulk to the seam. It also makes the fabric spring away from the waist or shoulder more than normal box-pleating, knife-pleating or gathering does. It was fashionable for gathering large sleeves to the shoulder on men's clothing during the 15th century, and was also a popular method during the 16th century for attaching full skirts to waistbands and bodices.
Cartridge pleating must be sewn by hand, but in many cases is worth the effort. When creating an Elizabethan gown with a heavy skirt, it adds to the period silhouette; in some cases, the "spring" caused by cartridge pleating can eliminate the need for a bumroll under the skirt to hold the fabric out from the hips.
If you've never cartridge pleated anything before and plan to do it for a skirt or sleeve, it's a good idea to take a length of the fabric you'll be using and pleat it, using the following instructions, before pleating the skirt or sleeve itself. This way you can work out the optimum stitch size, gathering tightness, etc. for this particular fabric.
 First, take the edge of your skirt which you plan to attach to a waistband and fold over the edge to the inside 2 to 3 inches. If the skirt fabric is a relatively thin one, you can add a strip of wool, flannel, velvet, or other thick fabric inside this fold to give the pleats more body.
Using a strong thread (I use a silk buttonhole twist), sew a largish running stitch half an inch away from the folded edge of the fabric. Leave a length of thread free at the beginning and end of the stitch. Repeat this running stitch half an inch further away from the edge, making sure that the thread goes in and out of the fabric at the same places as your first row of stitching did. Leave lengths of thread free at the beginning and ends of this row, as you did the first one. Once again, move 1/2 an
 inch further away from the edge and do another row, matching the ins and outs of the above two rows of stitches.The size of the stitches depends on the thickness and body of the fabric you're pleating. If you're using a heavy upholstery velvet, the stitches can be half an inch to 1 inch wide. If you're using a brocade or other thinner fabric, make the stitches 1/4 to 1/2 inch wide. Experiment a little, if possible, before starting on the actual clothing item.
Knot the three threads together at each end. Then begin pulling on the threads at one end, gathering the fabric as you go. It should accordion together into deep pleats. (see picture to the right) Ideally, you should gather the fabric tightly enough so that it doesn't slide back and forth, but not so tightly that there's a lot of tension on the threads. Once you've gathered the fabric, and measured it to see that it fits the waist, knot the threads you used to gather the pleats together so that they stay properly gathered.
 Sew the pleats to the waistband. Instead of sewing the waistband and the edge of the fabric together as you do with normal pleats, with cartridge pleats, you whipstitch the gathered edge of your fabric to a finished waistband, armscye or other seam edge. Lay the outside of the waistband/whatever against the outside of the pleats, with the waist edge matching the edge of the cartridge-pleated fabric. Using a strong thread, stitch the waistband to the top of each pleat with two or three stitches. The finished product should resemble the picture below.

For the doll maker miniaturist I have found that if you use the 1" or 1/2" pretty pleater board it makes nice cartridge pleats. Since the cartridge pleat is kind of a big pleat the 1" seems like the right scale for ladies. You can see my article on pleaters here: http://creativedoll.blogspot.com/2008/01/pleaters.html
Michelle
Michelle
Leed, Drea, A Short Tutorial on Cartridge Pleating a Skirt] ©2000 Dayton, OH: Author. Retrieved [8/16/08] from the World Wide Web: elizabethancostume.net
Wednesday, August 13, 2008
Early Victorian Fashions 1837 - 1860
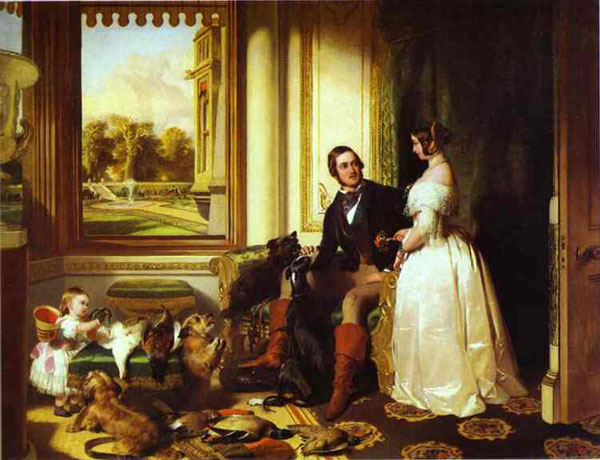 Windsor Castle in Modern Times by Landseer depicts the Queen and the Prince Consort "at home" in the 1840s.
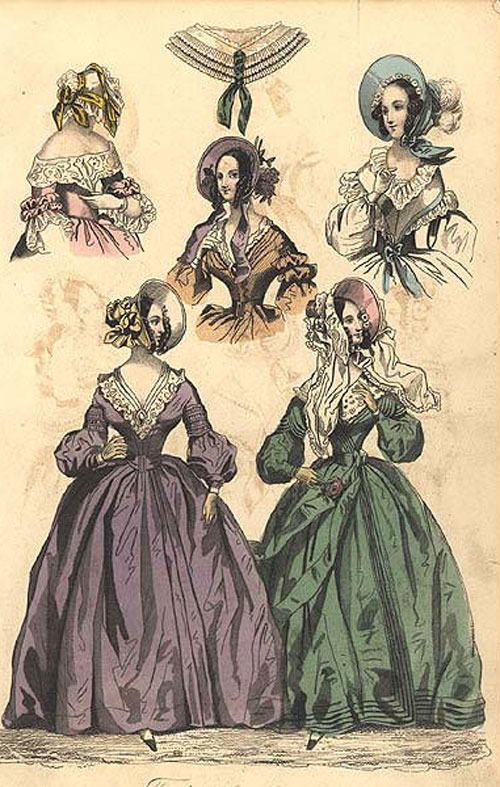 The term "Victorian fashion" refers to fashion in clothing in the Victorian era, or the reign of Queen Victoria (1837–1901). It is strictly used only with regard to the United Kingdom and its colonies, but is often used loosely to refer to Western fashions of the period. It may also refer to a supposedly unified style in clothing, home décor, manners, and morals, or a culture, said to be prevalent in the West during this period.The broad silhouette of the 1830s was replaced with a triangular line with vertical emphasis. Shoulders became narrow and sloping, waists became low and pointed, and sleeve detail migrated from the elbow to the wrists. Where pleated fabric panels had wrapped the bust and shoulders in the previous decade, they now formed a triangle from the shoulder to the waist of day dresses.Skirts evolved from a conical shape to a bell shape, aided by a new method of attaching the skirts to the bodice using organ or cartridge pleats which cause the skirt to spring out from the waist. Full skirts were achieved mainly through layers of petticoats. The increasing weight and inconvenience of the layers of starched petticoats would lead to the development of the crinoline of the second half of the 1850s.
Sleeves were narrower and fullness dropped from just below the shoulder at the beginning of the decade to the lower arm, leading toward the flared pago
 da sleeves of the 1850s and 1860s.
Evening gowns were worn off the shoulder and featured wide flounces that reached to the elbow, often of lace. They were worn with sheer shawls an opera-length gloves.
Another accessory was a small bag. At home bags were often white satin and embroidered or painted. Outdoor bags were often green or white and tasseled.
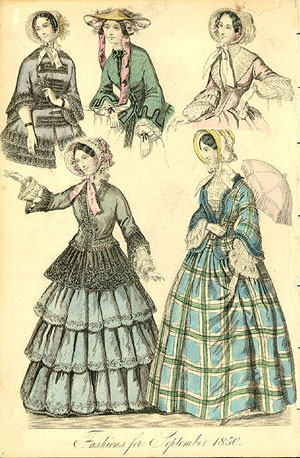
The introduction of the steel cage crinoline in 1856 provided a means for expanding the skirt still further, and flounces gradually disappeared in favor of a skirt lying more smoothly over the petticoat and hoops. Pantalettes were essential under this new fashion for modesty's sake.
By the early 1860s, skirts had reached their ultimate width. After about 1862 the silhouette of the crinoline changed and rather than being bell-shaped it was now flatter at the front and projected out more behind.
Day dresses featured wide pagoda sleeves worn over undersleeves or engageantes. High necklines with lace or tatted collars or chemisettes completed the demure daytime look.
Evening dresses had low necklines and short sleeves, and were worn with short gloves or lace or crocheted fingerless mitts. Large crinolines were probably reserved for balls, weddings and other special occasions.


Princesse Albert de Broglie - 1853
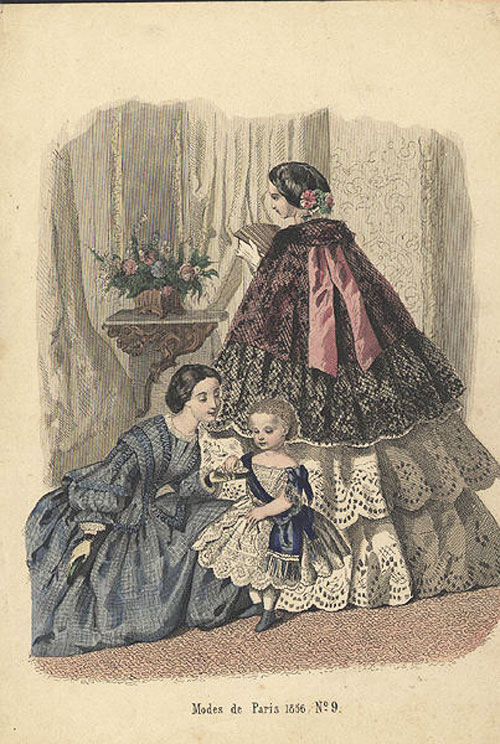 unwanted bulk at the waist; this spelled the end of the brief fashion for border-printed dress fabrics.
Heavy silks in solid colors became fashionable for both day and evening wear, and a skirt might be made with two bodices, one long-sleeved and high necked for afternoon wear and one short-sleeved and low-necked for evening.
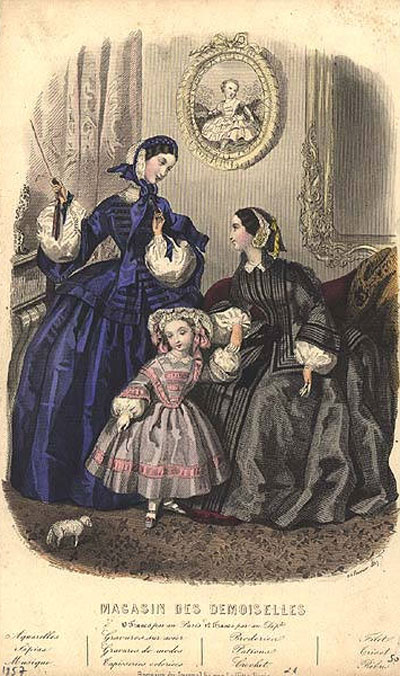
As the decade progressed, sleeves narrowed, and the circular hoops of the 1850s decreased in size at the front and sides and increased at the back. Looped up overskirts revealed matching or contrasting underskirts, a look that would reach its ultimate expression the next two decades with the rise of the bustle. Waistlines rose briefly at the end of the decade.
Fashions were adopted more slowly in America than in Europe. It was not uncommon for fashion plates to appear in American women's magazines a year or more after they appeared in Paris or London.
Michelle
thnx to: Wikipedia and University of Washington
Saturday, August 9, 2008
Chapter 6 - The Inspiration
Evelyn Ackerman's book, “My Favorite Patterns for Dressing Antique Dolls, 1865-1925” contained the inspiration dress. Evelyn’s doll is described as a petite Bru and is 12 ½” tall. That would be perfect for our 12” dolls and my Emilie Claire! Ms. Ackerman describes the dress: “…The illustrated example is made from white dotted Swiss with china silk lining…. The trim is ¼” lace edging and is all the trim that is used.
I had a large piece of dotted Swiss and shared with my friends. The fabric would be perfect so we planned the stages of developing the dresses for our dolls. Each of us had the book so we copied the pattern and instructions, read them through and talked about the construction. We all had ideas about our dresses. Using the pattern from the book, we made muslin to use for fitting the gown to our own doll’s figure. We worked together on the garments but we each had different interpretations. Kate and Pat dyed their fabric pink while I left mine white and lined it with a pink Swiss. One has ruffles another does not. I chose not to make ruffles. Pat chose to ruffle but changed the form due to the fabric weight. We used different trims and ideas, all the same dress, yet all different when completed. Given the choices, each person makes from a wide variety of inspiration (fashion plates, favorite colors, movies); we believe this would be a great project for a club.
Kathi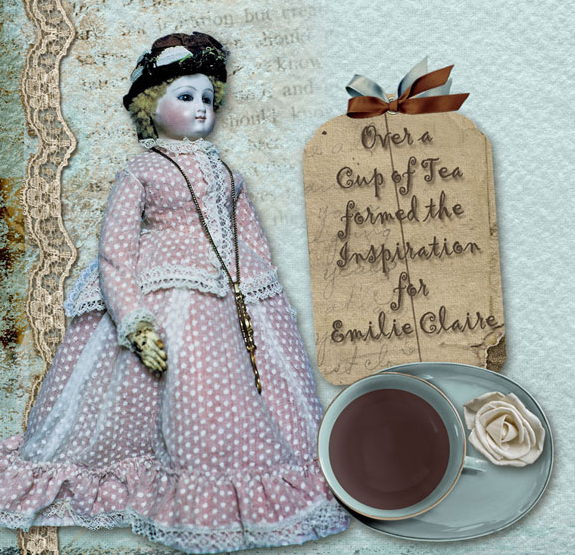
Wednesday, August 6, 2008
What do Dollmakers do when they are not working on dolls?
Well, this one dabbles in learning other miniature skills. Often I describe myself with Adult Attention Deficit. No lie! I cannot finish a large project to save my soul. Really, I cannot stay focused long enough. That is why I do not have a doll’s house, or a real miniature shop or a completed room box.(I have to admit I am getting close on the room box, though. I will share when I am done.) So, how do I remedy my passion for trying new things and having a completed project? I opt for small ones. That is correct. I make vignettes. Vignettes allow me to try many new things; show off a piece of furniture or a class project or place some collected items together to show them off. One needs to stay focused on the subject, but if it is a short subject, that is not a problem.
My inspiration is a picture from “Victoria" magazine. I thought the simplicity of the potting bench on the porch delightful and serene. I look at this every day. No, it is not your eyes, my picture is a little crooked. I edited the inspiration picture from the magazine a bit, as there were doorways and screens and a porch bit the private corner, this moment in time is what I wanted to capture. As I do not build furniture very well, my friend Bill, cut the parts to the table to my specification and I assembled and painted the piece. I purchased the pots, a few tools, the watering can and Al Chandronait basket, but I created the rest. The flowers, the narcissi, and quince designed by me, the violets (directions by Ruth Hanke of Hanky Panky Crafts, http://hankypankycrafts.com/ ), all completed by me. I even figured out the design for the French FlowerCan. All the precious pieces inserted into a small 5” X 7” shadow box (Hobby Lobby) with scrapbooking stickers to make it fun.
Now you try it!
Kathi 
My inspiration is a picture from “Victoria" magazine. I thought the simplicity of the potting bench on the porch delightful and serene. I look at this every day. No, it is not your eyes, my picture is a little crooked. I edited the inspiration picture from the magazine a bit, as there were doorways and screens and a porch bit the private corner, this moment in time is what I wanted to capture. As I do not build furniture very well, my friend Bill, cut the parts to the table to my specification and I assembled and painted the piece. I purchased the pots, a few tools, the watering can and Al Chandronait basket, but I created the rest. The flowers, the narcissi, and quince designed by me, the violets (directions by Ruth Hanke of Hanky Panky Crafts, http://hankypankycrafts.com/ ), all completed by me. I even figured out the design for the French Flower
Kathi

Friday, August 1, 2008
New Fabric - Printed Pima Cotton Lawn
Hot of the press....more new fabric:
Imported 100% pima cotton lawn prints.

 I can get other colors of the Polka Dot...Do you like it? If so let me know.
Michelle
Imported 100% pima cotton lawn prints.


 I can get other colors of the Polka Dot...Do you like it? If so let me know.
Michelle
Subscribe to:
Posts (Atom)


