Saturday, January 29, 2011

Mary Kathleen Part 3

Making the skirt was quite the event and I am sorry now I did not take pictures during the making. It was a remarkable sight with all that silk and silk tulle. Figuring out the layout and how to make it look like the picture. Whew! Those panels and pleats and ruching, and embroidery were a challenge. I lay awake at night to figure out which step came next, just thinking through the construction was tiring. Ultimately, it was a nine-panel skirt with silk tulle ruching over six panels. (It looks like three.) There is pleating running vertically in the rear of the skirt, lace attachments and pleating running horizontally around the lower edge above the top frills. Embroidered silk flowers round the ruffle, and lace collar edges show around the lower ruffle. The theme was “Girls in White Dresses with Blue Satin Sashes”. The blue taffeta sashes are on the back of the skirt. I opted out of a blue waistband as it was not correct for the dress, and the sash did not circle the waist. Had I read the directions simply, and not READ INTO the directions, the result might have been different, sadly disqualification was the result. I am not sad, nor should you be, rules are rules. The real result was I became a better sewer and learned many couture techniques.
I have taken a photograph of the underside of the dress for you to see the ties that hold the skirt in place at the rear of the figure. This enables the wearer to walk in measured and uncomfortable steps, but also keeps the skirt from entangling in the legs.
A close-up front closure shows the hooks with thread eyelets. The back is quite decorative and a front apron is part of the display. The front closures will not show when the apron buttons to the waistband. (Notice the buttons.)
The apron will be next.
Kathi

Inside the Skirt

Saturday, January 22, 2011

Mary Kathleen Part 2

Today we continue discussing the undergarments of the 12” French Fashion Doll. I named this doll Mary Kathleen. I call her “Molly” after my grandmother. The next garment to go on the figure is a corset. I made six of them. The first five did not go so well. Then I changed to a pattern made by someone else. (I will not try my own again; I like this one too well.) Last year, at the UFDC convention, we received a digital journal. A chapter of the journal contained patterns. Lucille Clay’s Lingerie Project was included. Marie Scopel and Susan Sirkis presented the patterns and instructions of Lucille’s project and from this is the pattern for the corset. I did a tiny bit of fitting, but in general, it is the loveliest pattern. I did use a sewing machine and the stays are not whalebone or metal but plastic. You will see in the construction, the corset closed in front with hooks and eyes, and laced in the back through eyelets. The corset is tightly fitting. Very tightly, I can barely get it off and on myself. The lace binding is chain stitched by hand for a nice finish. The eyes added to the bottom of the corset hold the hook portion of the slip. The corset helps support the weight of the slip, and I have taken advantage of the low position to keep the waist small.
The slip hooked to the corset is full and trains in the back to support the fullness of the skirt. This formal slip holds more decoration than a chemise or an everyday petticoat.
Kathi Mendenhall

Monday, January 17, 2011

The Convention Dress

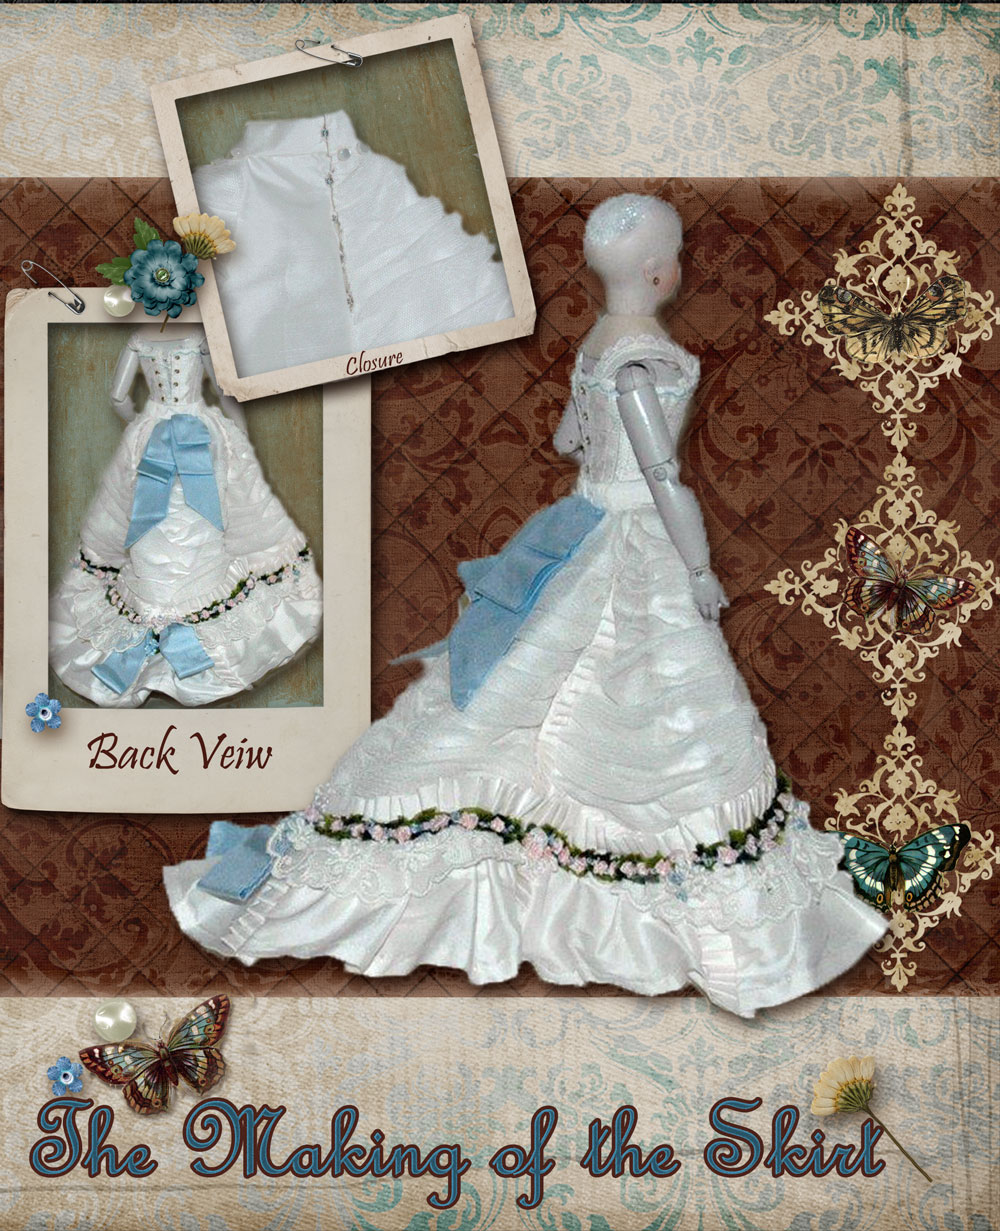
I made a dress to take to the UFDC convention this past summer for My Favorite Things. This took 2 ½ months to make. I selected a fashion plate from a period I wanted to try, 1877 and researched to make things as authentically as I possibly could. As we go through these garments, please understand that “authentic” to me is, as a woman of the day would have worn her clothes. I try to sew as authentically to the period as I can. When sewing for antique dolls, “authentic” is a technical term for sewing of the period. I try to do both, but sometimes I miss.
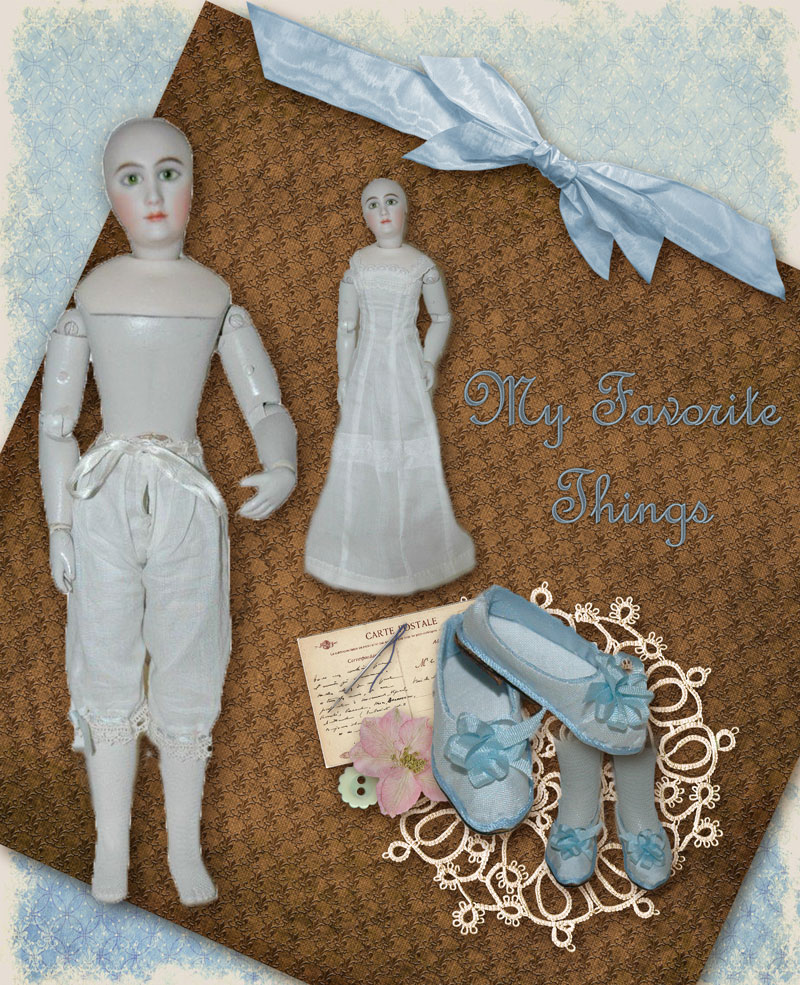
The doll model is my Ultimate Fashion Doll by Alice Leverett Henderson, www.justalice.com. She is a Portrait Jumeau reproduction with green eyes. (Not authentic, but I wanted it that way.)
As I went through my processes I decided remake every pattern as I dressed the figure. What a lot of work. The split drawers trimmed with French beaded edging at the knees and the waist. Using a multipurpose trim aided the gathering of the edges to fit much easier.
The stockings are silk knit cut into a stocking shape and sewn with very close stitches along the back of the leg. The garters for this doll are simply tied ribbons.
I selected an antique shoe design, which consisted of ribbon stripes across the toe. As I sewed the stripes of 2mm silk ribbon, I realized I was not going to make those shoes a success. The scale was just off. I then tried to locate a small blue striped fabric, to no avail. Plan two, (or three or four), make the shoes of the same silk as the dress, and add a piping and bow. How boring. They are pretty, however!
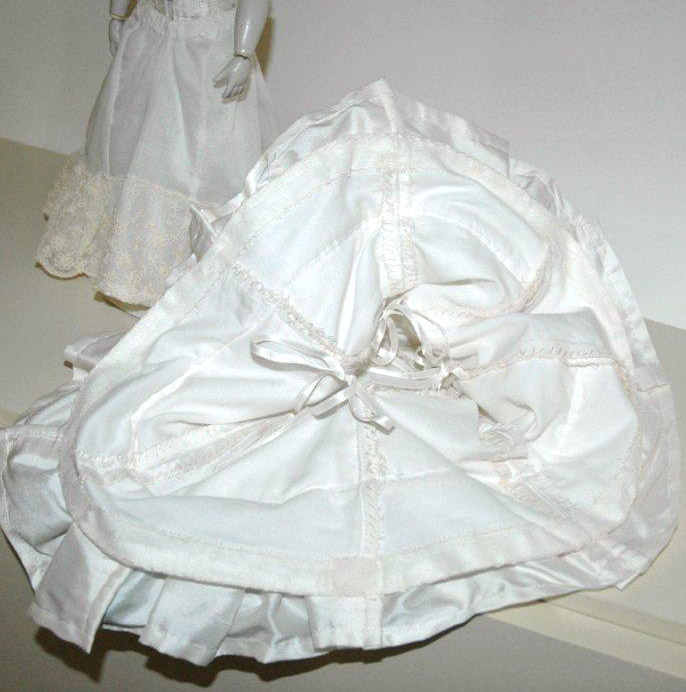
The final addition is the chemise. I should have written down the book I researched that showed a full-length chemise. Generally, we see them hemmed at the knee. The chemise looks a tiny bit long, but when the corset goes on the chemise raises from the floor.
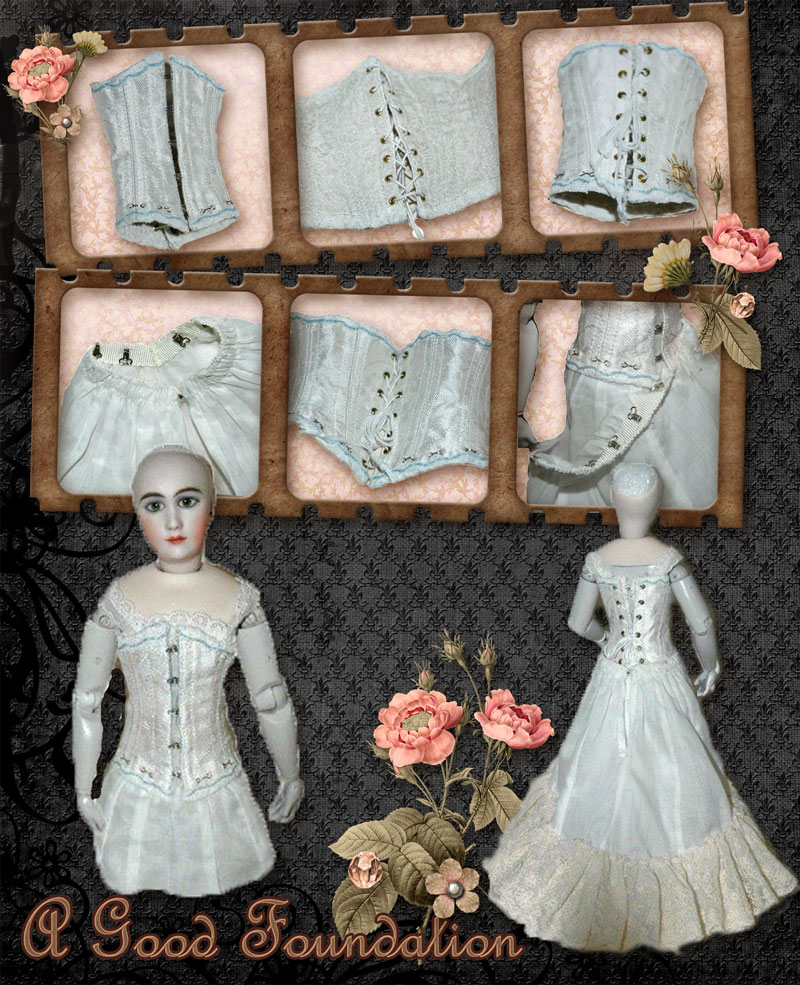
Stay tuned for the corset and formal slip. You just cannot beat a good foundation!
Kathi