Monday, September 28, 2009

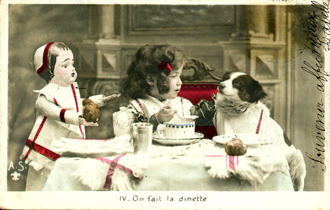
Just 'cause the are CUTE!

Sometimes you just need some cute! Just to make you smile...Don't you want to go play now?
Michelle minidolls.com
Wednesday, September 16, 2009

Cathy Hanson Bru (6”)

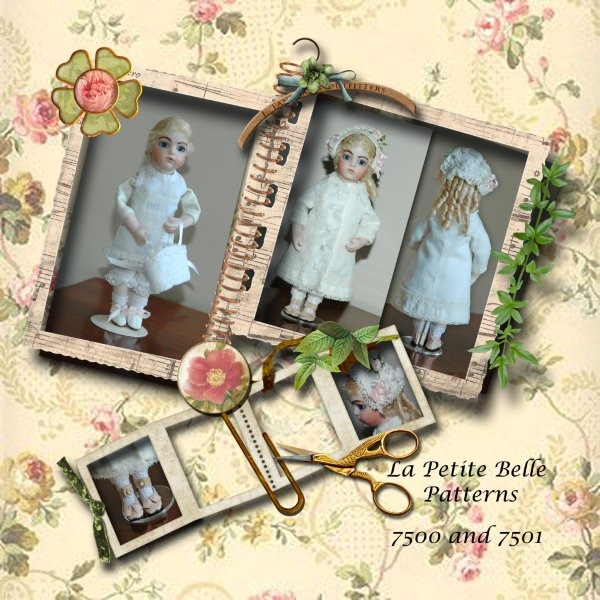
I was thrilled when I was able to buy a Cathy Hansen 6” Bru. She is so wonderfully executed and I love her “little” body. When I received her I thought she would be a more petite scale. But I have to say working with her is a dream. Though she is 6” tall her body scale is more childlike and solid. She is not chubby; nor as lithe as some 6” small dolls. To repeat, she is a dream to dress. I have attempted to make some patterns for her, but this year has caught me at a loss. I hope to continue next year adding more patterns and a new way to display her. (Is there any real new way? I don’t know, either way it will be new to me to create.) Cathy has been a great associate in developing my patterns and her style is not one I can emulate. She has a knack for fabric and trims and her taste is exquisite. To see and learn more about Cathy’s dolls you can visit her website: http://www.dollsbycathy.com/

When developing patterns for a new (to me) doll, I usually begin with a good set of undergarments. In pattern 7500 ($5.00) I developed a traditional pair of pantalets with a tuck and gathered lace edging, a slip that is close to the body with matching trims, a pair of socks with lace cuffs and she holds her set of stays. (They do fit her.) The little slippers are copied from an antique pair in Theriault’s auction catalog named The Way They Wore. If you have this catalog they are on page 81.

I have also offered a new and simple dress of batiste and lace which caught my eye in an antique auction as well. Keep your eyes open at the auctions and in the antique shops, something there is bound to catch your eye. The elegant simplicity I thought would be a wonderful start for the 6” cabinet doll line of patterns. The hat shown with the dress did not suit my taste so I found another for inspiration. The shoe pattern is from an historical pattern but improvisation was necessary to make it fit.

The dress construction method is more 20th century as this tiny doll needed finished seams. It is lined rather than rather than the lining and dress fabrics as one and overcast the edges. I like the super finished inside on a doll such as this. The lining method gives the garment strength for the dressing and undressing. However, both methods are successful with this pattern. It fits very well and is La Petite Belle Pattern 7501. ($7.00)

Both patterns and fabrics can be purchased at the Doll Artist’s Workshop by clicking here:Cabinet Doll Pattern
Kathi

Thursday, September 10, 2009

A project to Share

While we are waiting for me to finish up on some other items, new patterns, and deadlines, I thought I would share something I am doing now. The goal here is to share with you the steps to making this miniature room. I like Victorian rooms with all the knick knacks and bric-a-brac around, but don’t think I would like to clean or dust the rooms. I also like the bare necessities of a minimalist’s room, but think it is not too homey or inviting. I like my friends and my comfort. So, I think I am an “in-the-middle-est.” Yes, I think that suits me fine. I really like having my things but don’t mind them all not being out at the same time. It’s kind of like sensory overload. Since my house is for sale and I have to keep it clean ALL the time, I like having a project I can work on, and put away, but also one that I can change out as I please.
Today I am sharing just such a project. At last I am able to work on it in earnest. I have been collecting and finishing the interior additions for quite some time, but never seem to get to the box itself. What you are seeing today is the box parts, open and closed, and a snippet of the wall paper being used for the “room.” (A room I can close up and put away, protected, or display when I want. Cool!)
The paper is from Itty Bitty and I purchased it at the Miniature Cottage. Currently, the box is painted on the outside with black and primed on the inside with white. My friend, Judy, is going to sand and paper it for me. Why am I not doing the work, you ask? Because I am no good at it! I don’t want to ruin it before I have a chance to enjoy it. I’ll have more opportunities to error as I go along. (Grin) So, we’ll see it again when Judy returns it to me.
The problem I need to solve is what I want on the outside. The goal is to decoupage it. But, do I decoupage a whole scene or bits and pieces of antique things? What about dresses and patterns, but what periods? Any ideas are greatly appreciated, but you can’t be hurt if I don’t do what you suggest. Hopefully, buy the time I get it back I will know the answer and have the supplies. Then there is shelving and flooring, but I am getting ahead of myself. Construction is not my greatest gift.
So, hang in there while I take you through my journey for the sewing room. There’s a great deal more to come.
Kathi

Thursday, August 27, 2009

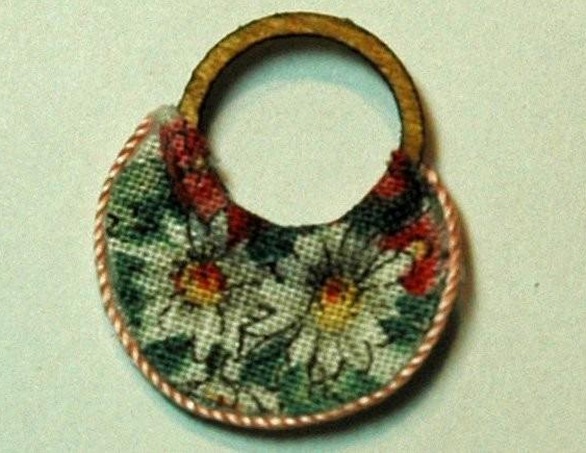
Make a Miniature Purse!

Supplies
Set of Laser Cut purse handles (minidolls.com has them)
Small print or solid for purse body
Silk thread for “piping”
Scissors
Glue

Directions
1. Center the pattern design you like on the purse pattern and mark it. (In your mind or with a pin)
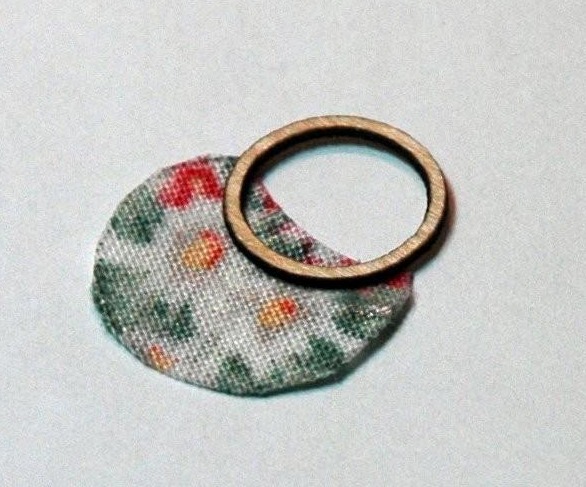
2. Turn the fabric to the wrong side and spread glue along the back of the cotton fabric. Allow to completely dry. This will keep the fabric together and it will not fray.
3. Trace the pattern to the fabric to the wrong side of the fabric, or over the glue with a pencil. Having a circle template helps keep the pattern centered and the circle round.
4. The sample uses the handles in their original form, but they can be painted and lacquered (nail polish, acrylic paints with spray sealer) or gilded or stained a different color. Use your imagination.
5. Glue the handle to the purse fabric on the wrong side, following the diagram. 6. Clip the curves showing inside the handle, and glue them over to the wrong side or inside of the purse.
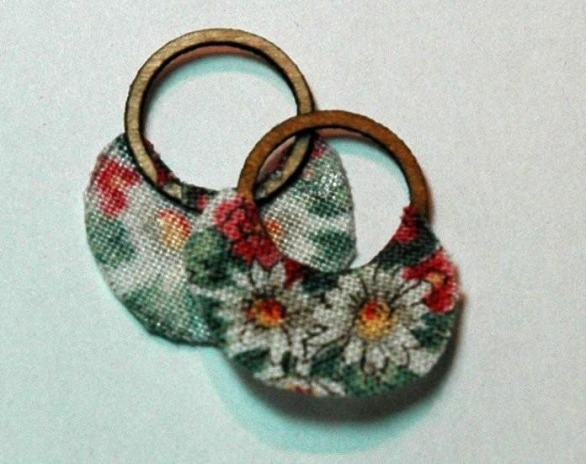
7. Complete both handles the same way. 8. With a small amount of glue on the edges, place the purses together wrong side to wrong side. Allow to dry.
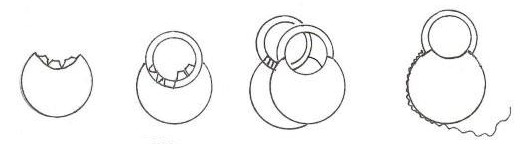
9. Place a small amount of glue along the outside edge and cover the edge with a silk thread, or small braid. (I used a twisted silk thread.) Trim away excess at the handles and you have a purse that opens and closes.
10.Place a hankie edge sticking out for more character.
For complete PDF file of tutorial plus added diagrams click here: PDF Tiny Purse

Monday, August 24, 2009

Chapter 12 - Emilie Takes a Trip

The suit of dotted Swiss is lined in pink Swiss batiste is most becoming on Emilie Claire. Emilie Claire is ready for her trip. The porter has taken her trunks and she waits with her personal items for the call to board the train, Lisabeth’s doll safely in her arms.

If you have reviewed the pattern for the original doll, you will see I have changed her jacket. It did not “suit” me. (Sorry I could not help it.) Emilie likes plainer clothes, more tailored and I made it to her wishes. The jacket is elegant in French ribbons and ribbon ties. I placed the purse as a belt purse as her hands are full.

Emilie is so rushed her bonnet ties are slipping. (That is my way of saying yes I noticed the picture is not perfect. We all do our best, do we not?) “Oh, I hear the whistle, the train is coming!” Emilie exclaims. Her parents settle her in and assure her they will follow in a few weeks. “Mind your best manners, Emilie Claire.”

Dear Diary
My hat arrived from the milliner yesterday. I was thrilled to open the box and see how special she made my bonnet. There is a sweet ruffle of lace added to the underside with a small bouquet of flowers peaking out. For my birthday, Father presented me with a new hatpin made with a real pearl. It is a treasure!
I still think of the young man I am to meet. It diverts me! E~C


Kathi